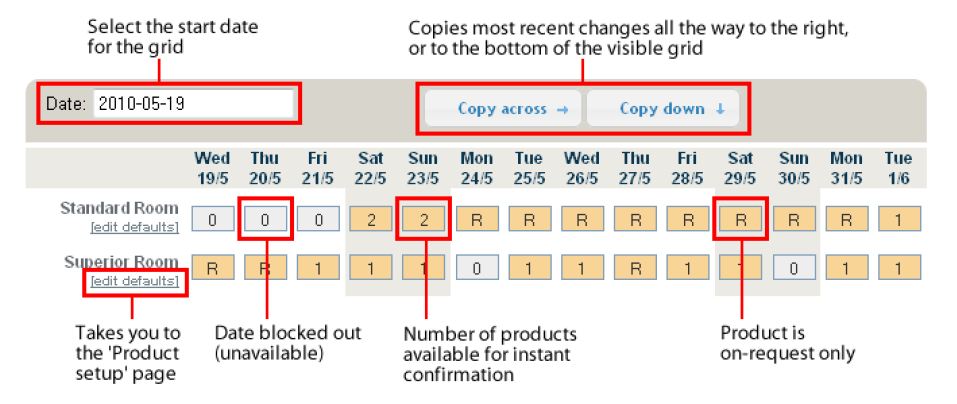
The Availability calendar is the first grid displayed on your Inventory Manager page. Use this calendar to manually allocate the number of rooms that you have available or block out dates as unavailable.
How to read the grid:
How to use the grid:
To select the start date for the grid, click in the date box and use the pop-up calendar.
To select a single day, click in the cell for the date you require, on the row for the product you wish to change.

You can then change the contents of that cell by typing the number of rooms to allocate or the price you wish to set for that date.
Use the “tab‟ key to move easily between cells.
The options are as follows:
- Number of items available (e.g. rooms, seats):
- To allow instant bookings enter a number between 1 and 999 (e.g. you would like to allocate 3 rooms or seats for customers to book). Once this allocation runs out any bookings for this day will be on-request or unavailable depending on your availability settings.
- Entering ‘0’ for availability will make a date unavailable for booking (i.e. blocked out).
- To make bookings on-request enter “R”. Any booking requests for these days will require you to accept or decline bookings. (see section 5.3)
- Rate for the day. (e.g. special room rate, or seat rate)
- Simply enter the price you wish that product to be sold for on that date.
- Minimum number of days required for bookings beginning on this day. (e.g. there is a minimum 2 night stay for bookings on the 30th of December)
- Click the “Min nights” button and you will see an extra row of cells open for each product
- Enter any minimum night stay rules you wish to apply for each day of a specific period
- The “copy across” and “copy down” controls allow you to easily apply changes to multiple cells:
- Clicking “copy across” will fill the cells to the right of the most recently changed cell all the way to the right side of the grid:
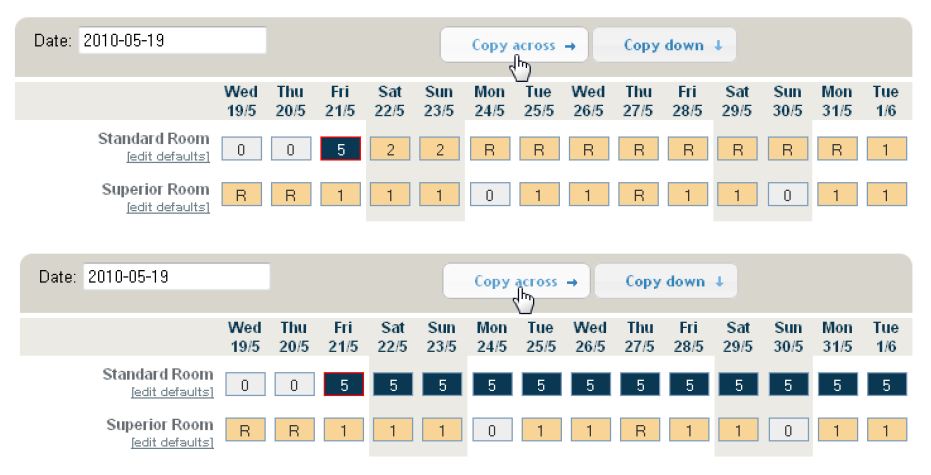
- Clicking “copy down” will fill the cells below the most recently changed cell all the way to the bottom of the grid.
Important
Click on the button located at the bottom right hand side of the page to save your selection. It’s very important you click “Save” otherwise your changes won’t be applied.